SharePoint lists are awesome, they have so many possible uses. When you create a Custom list, the Title field is the only editable field you get out of the box. But I’ve built a number of lists in which the user wouldn’t necessary know what to put in the title. And although there a few ways to get into the detail of a list item without clicking on the title of the item, doing that is the most intuitive way to get into a list item.
In the regular SharePoint 2010 interface you can’t change the type of the Title field from a single line of text to a calculated column. But this where the most awesome feature of SharePoint 2010 (in my humble opinion) comes in: customizing the form of your list with InfoPath 2010. Lets walk through the steps:
- Create your list in the SharePoint 2010 interface. Let’s call it the “Weekly Facility Incident Report”. It has the following columns:
- Week ending (date), mandatory field
- Facility (choice field, choices: A, B and C), mandatory, single choice only
- Notes (multiple lines of rich text)
- Days without an incident (number)
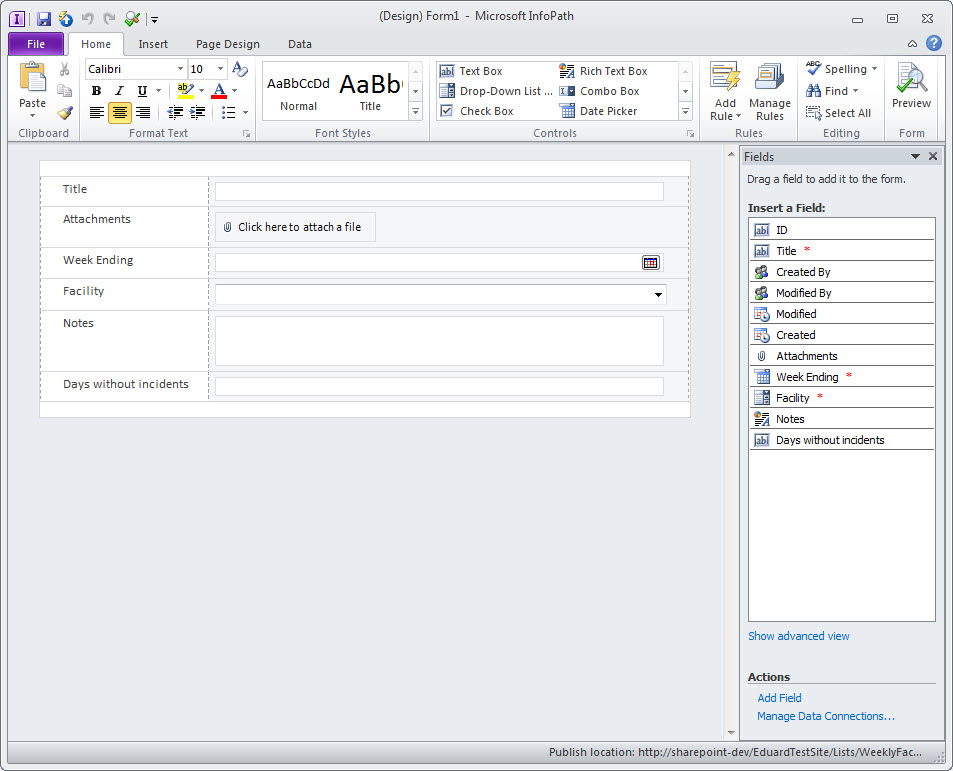
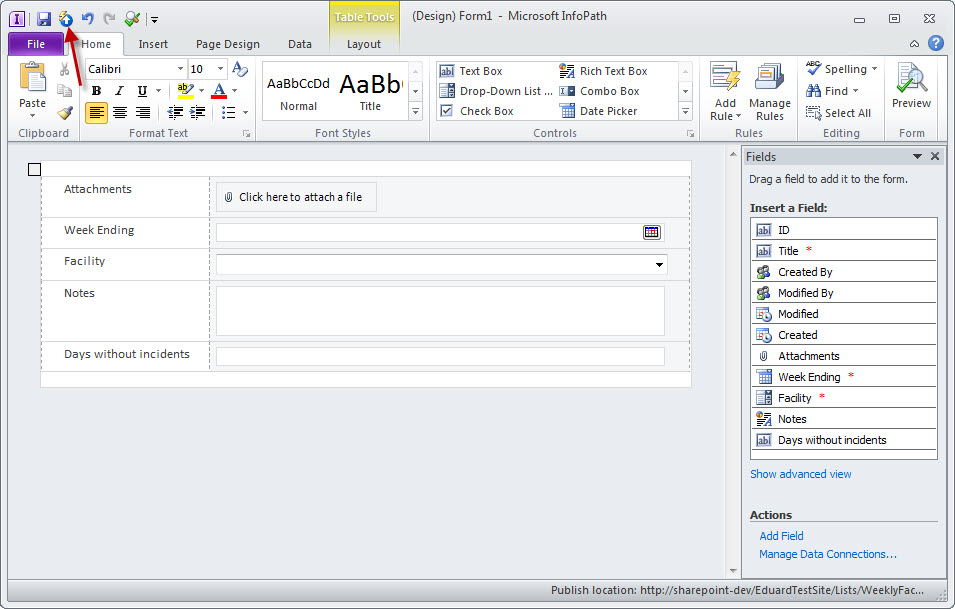
- Now go to the list and click on the List tab in the ribbon. Here you’ll find the button “Customize Form” with which you edit the form of the list with InfoPath 2010:

- Clicking the button opens the form in InfoPath:

- Now you can right click the Title field to display it’s properties:

- Now click the function button next to the default value:


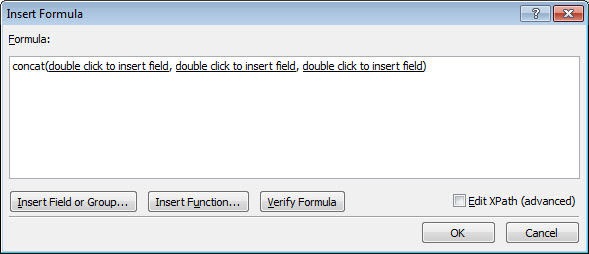
- In this menu you can write text, combine fields and use functions. Let’s make the Title always something like this: “Weekly incident rapport for Facility <name> for week ending <date>. It’s best to only use fields that are mandatory for the list. These are the steps for creating that default setting:
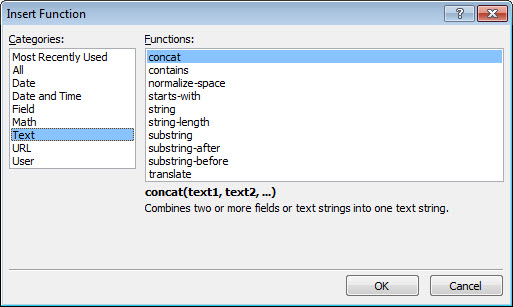
- Click on “Insert Function” and under Text, select the “concat” function (to concatenate multiple elements):

- Now add the first piece of text by single clicking on the first underlined section and typing the text:
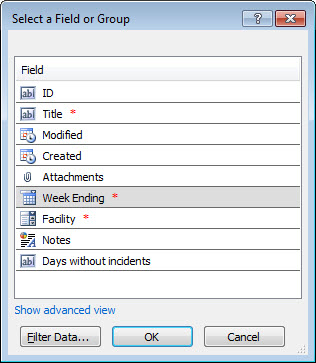
- Double click to add a field on the second element and select the Facility field:

- Add the next piece of text by clicking on the 3rd element, add a comma, click the Insert Function button and select the substring function (to display only the date of this date time element):
- Double click the first insert field element in this function and add the Week Ending date:

- To only show the date (not the time), go from position 1 for 10 characters:
- Click OK and the formula is now saved for the default value:
- Click on “Insert Function” and under Text, select the “concat” function (to concatenate multiple elements):
- In the form itself, you can now select the row with the Title field, right click and delete it (because it will be set by default anyway):

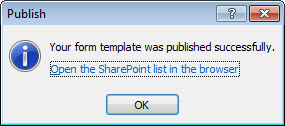
- Now, to publish the form, click the Quick Publish button:


- Now the form is published and when you create a new item in the list, the title is set automatically: