
Sharing, a new concept in SharePoint 2013, allows users (who have the correct rights) to share the Site, List/Library or item/file with other users. However, the process and user experience is not always the same. It is important to understand the differences in each method. Especially for administrators/site owners, this can become a bit of a headache when trying to manage a governance strategy. So let’s get to it!
Here is a table of the possible ways you can
‘Share’ webs, libraries and items.
SharePoint Object: What type of object are we sharing? (Web, List,/Library, Item/File)
Share Button Location: Where the share action is invoked from./
Available Access: What level of access is available to be granted via the respective invoke method
Inheritance: Is inheritance broken?
Notes: Additional comments
| SharePoint Object | Share(Grant) Button Location | Available Access | Inheritance | Notes |
| Web | ‘Share’ below suite link bar | Groups already defined in the web | Retained | Using this method adds the user to an already created SharePoint group. |
| Web | Grant button on ribbon of Site Settings > Site Permissions | Groups already defined in the web AND all defined permission levels. | Retained Unless manually removed | This method allows owners to grant rights directly using the defined permission levels. This can yield unwanted results against the best practice of putting users into SP Groups. |
| List/Library | Library Settings via ribbon | All groups and all permission levels via the standard permissions page. | Retained Unless manually removed | This has not changed from SharePoint 2010 |
| List/Library | Grant button via ribbon after clicking Shared With > Advanced (Item must be selected OR Library Settings button on the ribbon. |
Broken | You are only given the Grant button if inheritance has already been broken on the list/library. |
|
| Document/Item | Share via document/item ellipsis | Can View (Read), Can Edit (Contribute) | Broken | If this dialog is used to give a user, who already has access to the site, the same or less permissions than they already have then no changes are made. If more permissions are granted and the level of access no longer matches the inherited parent, inheritance is broken and the item-level permissions are applied. |
| Document/Item | Share button via ribbon with item selected | Can View (Read), Can Edit (Contribute) | Broken | If this dialog is used to give a user, who already has access to the site, the same or less permissions than they already have then no changes are made. If more permissions are granted and the level of access no longer matches the inherited parent, inheritance is broken and the item-level permissions are applied. |
| Document/Item | Grant button via ribbon after clicking Shared With > Advanced (Item must be selected |
No SharePoint groups, only defined permissions levels | Broken | You are only given the Grant button if inheritance has already been broken on the file. |
Note: When using any of the dialogs to add users, SharePoint will automatically resolve users from your authentication providers. For OFFICE 365 users you can also enter someone’s External personal email address to send them and invite to access the information (External Invites must be enabled). This information will automatically resolve because this type of authentication is a ‘claim’ and access will not be granted until the user provides proof they are the owner of the email. Other methods of authentication include Azure ACS (Azure Access Control), Forms-Based Authentication, etc.
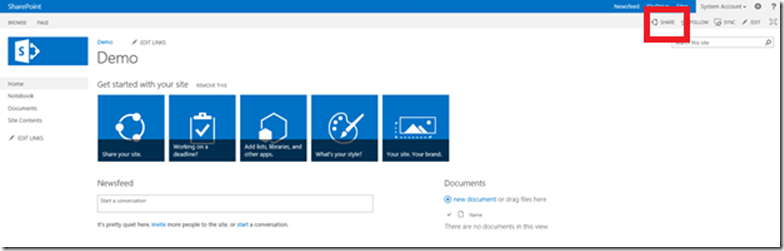
The Web
A web (aka Subsite) can be shared in two different ways. The first is by using the share button below the suite link bar as shown below,
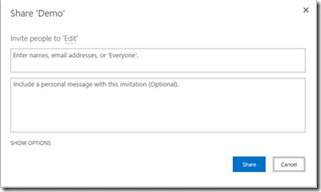
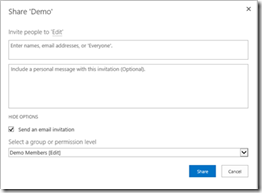
After clicking on the share button you will receive this dialog:

This window tells you who the site is currently shared with as well. However, if it I more than a handful of people it will just say LOTS OR PEOPLE. Simply enter in a username(s) into the Invite people section and hit
Share.
By doing it this way you are automatically assigned contribute rights to the user.
To assign different rights click on the
Show Options link and adjust the settings as show below.
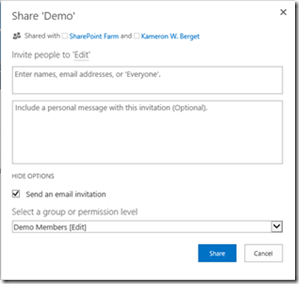
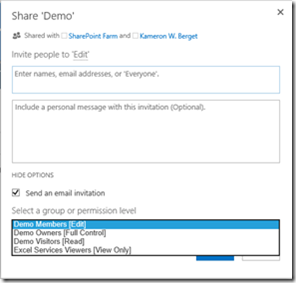
From here you have access to all SharePoint groups that have been defined.
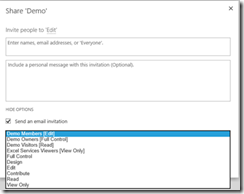
The second way to adjust a web’s top level ‘Share’ permissions is the traditional way via ‘Settings Gear’ > Site Settings > Site Permissions >
Grant. This method provides access to all SharePoint groups and permission levels as well as creating new groups and permissions levels. This also affects any down-level object that is inheriting from this web. When clicking on Grant permissions you get a similar dialog. However, now you have access to the direct permissions levels as well. Once again we must click show options or it will default to Contribute group.
The final way to get to the site permissions is by using the
Shared With setting from the Settings gear. Clicking on Advanced brings you to the same dialogs as described above.
The List/Library
Lists and libraries also have two ways of sharing their content with others. The first method is via the
Shared With button on the ribbon.

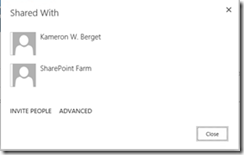
By selecting this option you will be presented a dialog showing who the list/library is currently shared with.
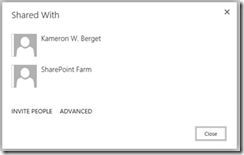
Click advanced will bring you to the traditional library permissions settings page where you can managed access.
The second way is via the
Grant button within the library permissions settings page. However, this option is unavailable unless you have already broken inheritance on the list/library as shown below.

You are then given a similar dialog. However, this time you are given direct permission levels as options and it defaults to edit. You must click on show options to change the permissions.


The Document/Item
The document/item level has 3 different ways to share information and poses the greatest struggle for site owners. Although there is a quick way to check for broken inheritance on down-level items, the new share option on files gives users the power to grant access and breaks inheritance.
The first, and probably most common method is going to be the
Share button on the options menu of an item or document. This options menu is accessed via the
(. . .) ellipsis as shown below:
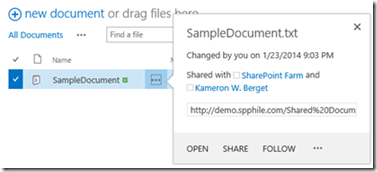
From here we are now given a much different dialog that we did before:
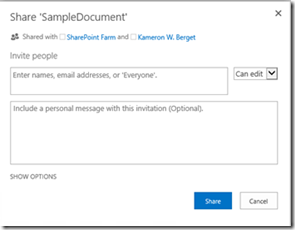
From here we can assign access but only ‘Can edit’ and ‘Can View’ and ‘Can Edit’ is select by default.
Can Edit = “Contribute”
Can View = “Read”
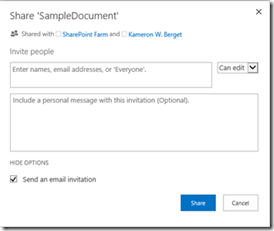
This is where it gets a bit tricky…..If the access that is assigned via this menu is Less than or equal to access the user already has, SharePoint will disregard the change and continue inheriting permissions. If the access that is assigned via this menu is
Greater than access the user already has, SharePoint will break inheritance and assign the user permissions automatically. This is very common with
External Invites as they typically do not have any access into the site until it shared with them. If they are shared on a file SharePoint will break inheritance automatically.
Take a look below for the before an after of this process:
SHARING AN ITEM
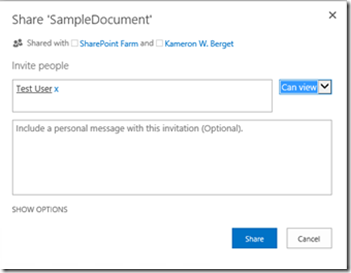
BEFORE SHARING
AFTER SHARING

The next way to share is via the share button on the ribbon with an item/document selected. This give you the same exact prompts as the ones shown above.
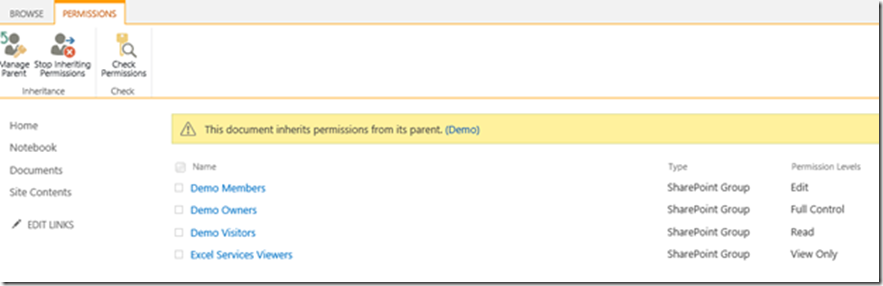
Checking Permissions
There are several ways you can check to see who has access to an object in SharePoint. Similar to the share button, we now have a
Shared With option that allows us to see who currently has access to that object. However, if a large number of people have access the dialog will simply say
Shared with lots of people. To get more detail click on
Advanced. This will bring you to the traditional
permission settings page that we are all used to. From here we can use the
Check permissions utility to see who has access.

Conclusion
In conclusion, SharePoint 2013 gives us new ways to share content within our sites. Not every experience is the same and it is important to understand the caveats of each.
{Kam}
